A support case can be created in the following ways.
-
By double-clicking on the IBI-helpMe symbol in the taskbar.
-
By selecting Create Support Case from the menu that opens via right-click on the icon in the taskbar.
-
By executing a keyboard shortcut (by default WIN + SHIFT + H)
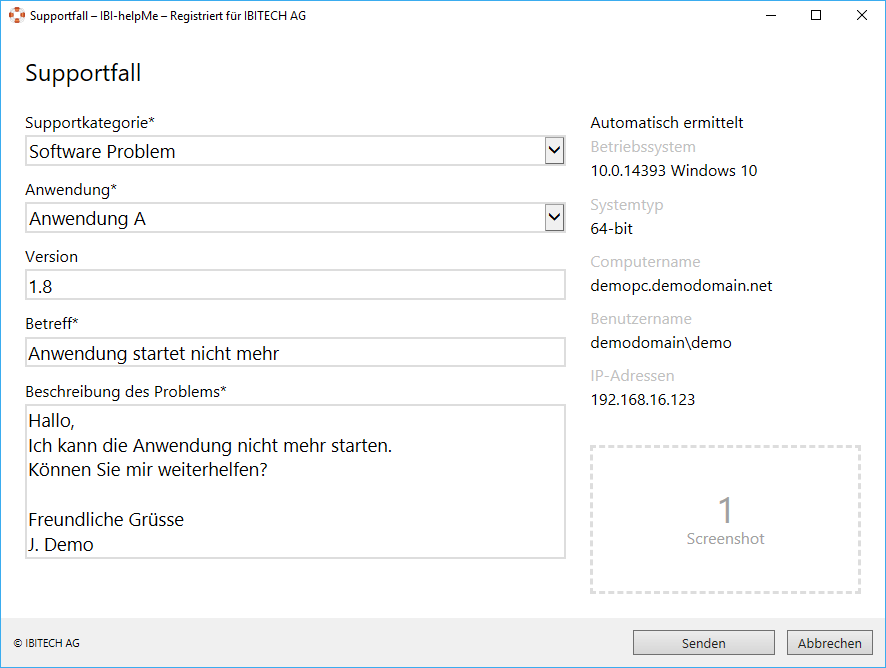
If one of the above options is performed, the window for creating a Support Case will open.
Depending on the setting, a screenshot is automatically created before the dialog Create Support Case will open.
As can be seen in the following illustration, the user can view all information determined automatically, such as computer name, IP addresses, etc.
If a link to the Active Directory (AD) exists and the Mail AD field has a valid email address when the user was created, the IBI-helpMe Client automatically reads the value so that the user can skip this step.
The behavior when creating a Support Case varies, depending on the delivery type setting. The behavior of the respective delivery type is explained on the relevant pages.